Volume Setup
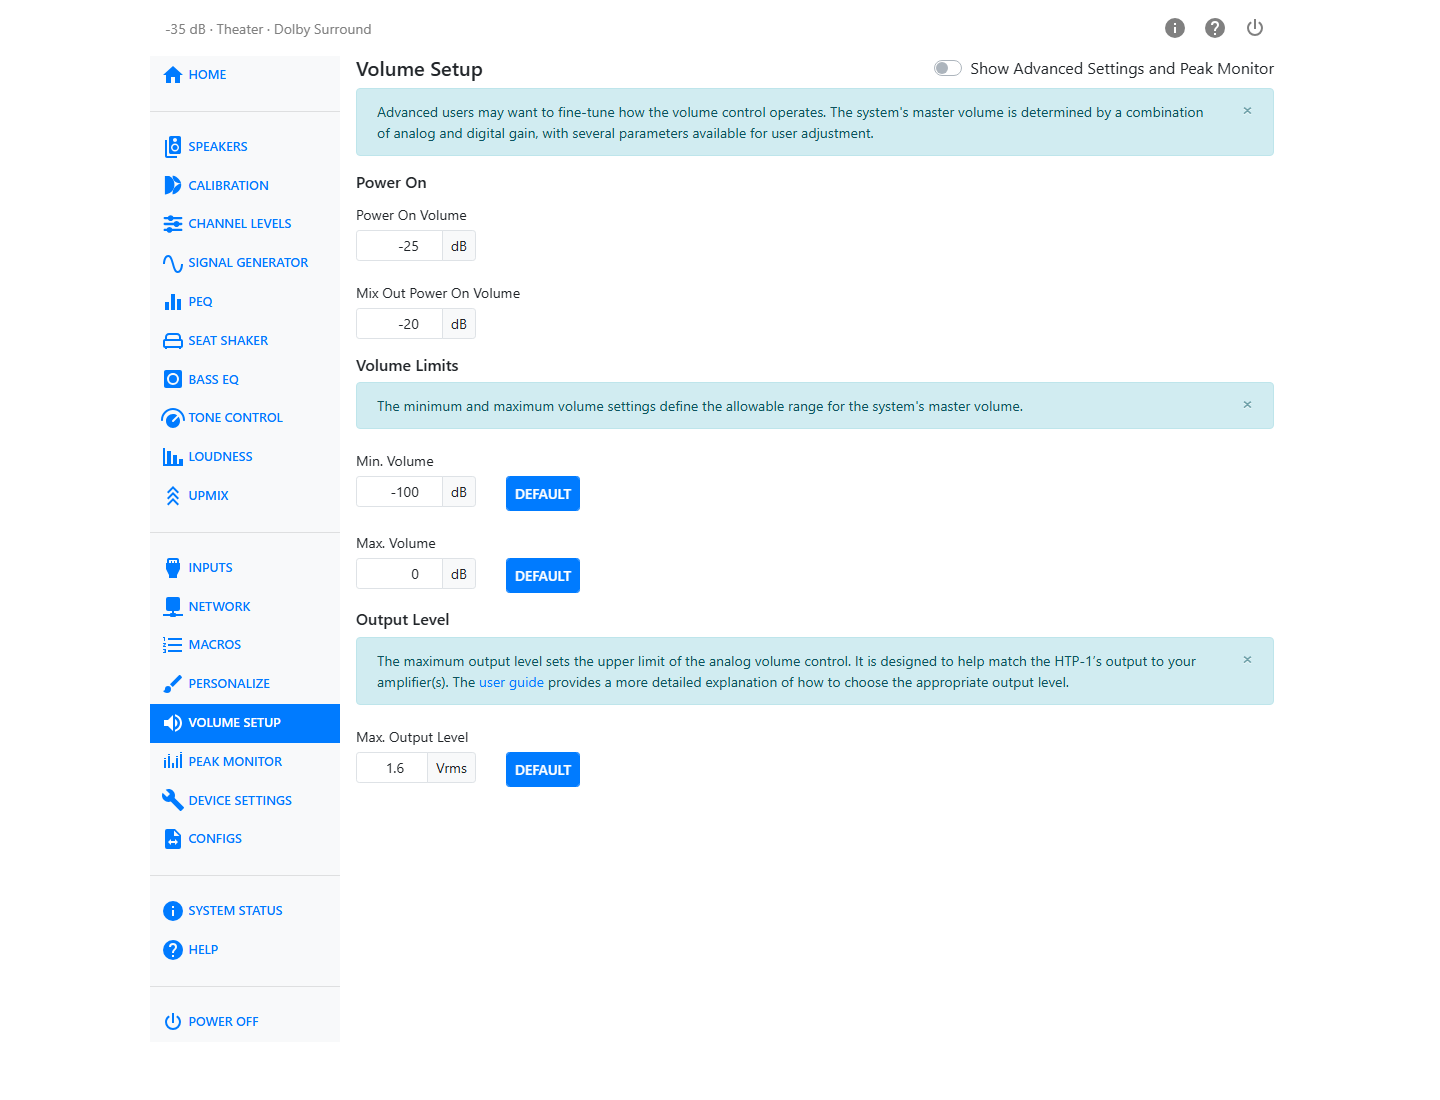
The HTP-1 uses a combination of analog and digital gain to implement the master volume. Volume Setup lets you configure the power-on volume, allowable volume range, Reference Output Voltage, and Maximum Digital Headroom, which together determine how the volume control behaves.
Power On
Power On Volume sets the master volume the HTP-1 uses when it turns on. Its underlying range is −100 to 0 dB.
When Zero Point is changed, Power On Volume is shown using the same shifted scale as the main volume. Zero Point does not change the actual power-on level.
For example, with Zero Point set to −15 dB, an underlying Power On Volume of −35 dB is displayed as −20 dB. After a restart, the HTP-1 returns to that same playback level and displays −20 dB.
The 0 dB underlying safety ceiling also shifts on the displayed scale. With a Zero Point of −15 dB, for example, the highest displayed Power On Volume is +15 dB.
Mix Out Power On Volume sets the startup level for the Mix Out output. Its range is −100 to 0 dBFS. Mix Out uses its own independent volume scale and is not affected by Zero Point.
Volume Limits
The Minimum Volume and Maximum Volume controls define the allowed range for the master volume, preventing the system from being turned down or up beyond limits you've chosen.
| Control | Range | Default button |
|---|---|---|
| Minimum Volume | −100 to −60 dB | Resets to the factory minimum |
| Maximum Volume | −59 to +22 dB | Resets to the factory maximum |
These ranges refer to the underlying master-volume scale. When Zero Point is not 0 dB, the Minimum Volume and Maximum Volume controls are displayed on the shifted scale, just like the main volume and Power On Volume. Changing Zero Point changes only the displayed values; it does not change the underlying limits or playback level.
Reference Output Voltage
Reference Output Voltage defines the nominal balanced analog output voltage, in Vrms, produced by a 0 dBFS sine wave at the HTP-1's internal 0 dB Master Volume. It is intended to match the HTP-1's output to your amplifier's input sensitivity—the input voltage required to drive the amplifier to full power.
This is a calibration reference only. Actual output depends on the program material and any processing such as Dirac Live, PEQ, trims, Loudness, bass management, and mixing.
| Control | Range | Default button |
|---|---|---|
| Reference Output Voltage | 0.1 to 4 Vrms | Resets to the factory value |
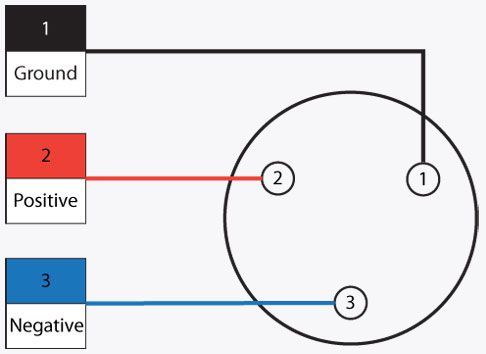
The HTP-1's balanced outputs are on XLR connectors.
Show Advanced Settings and Peak Monitor
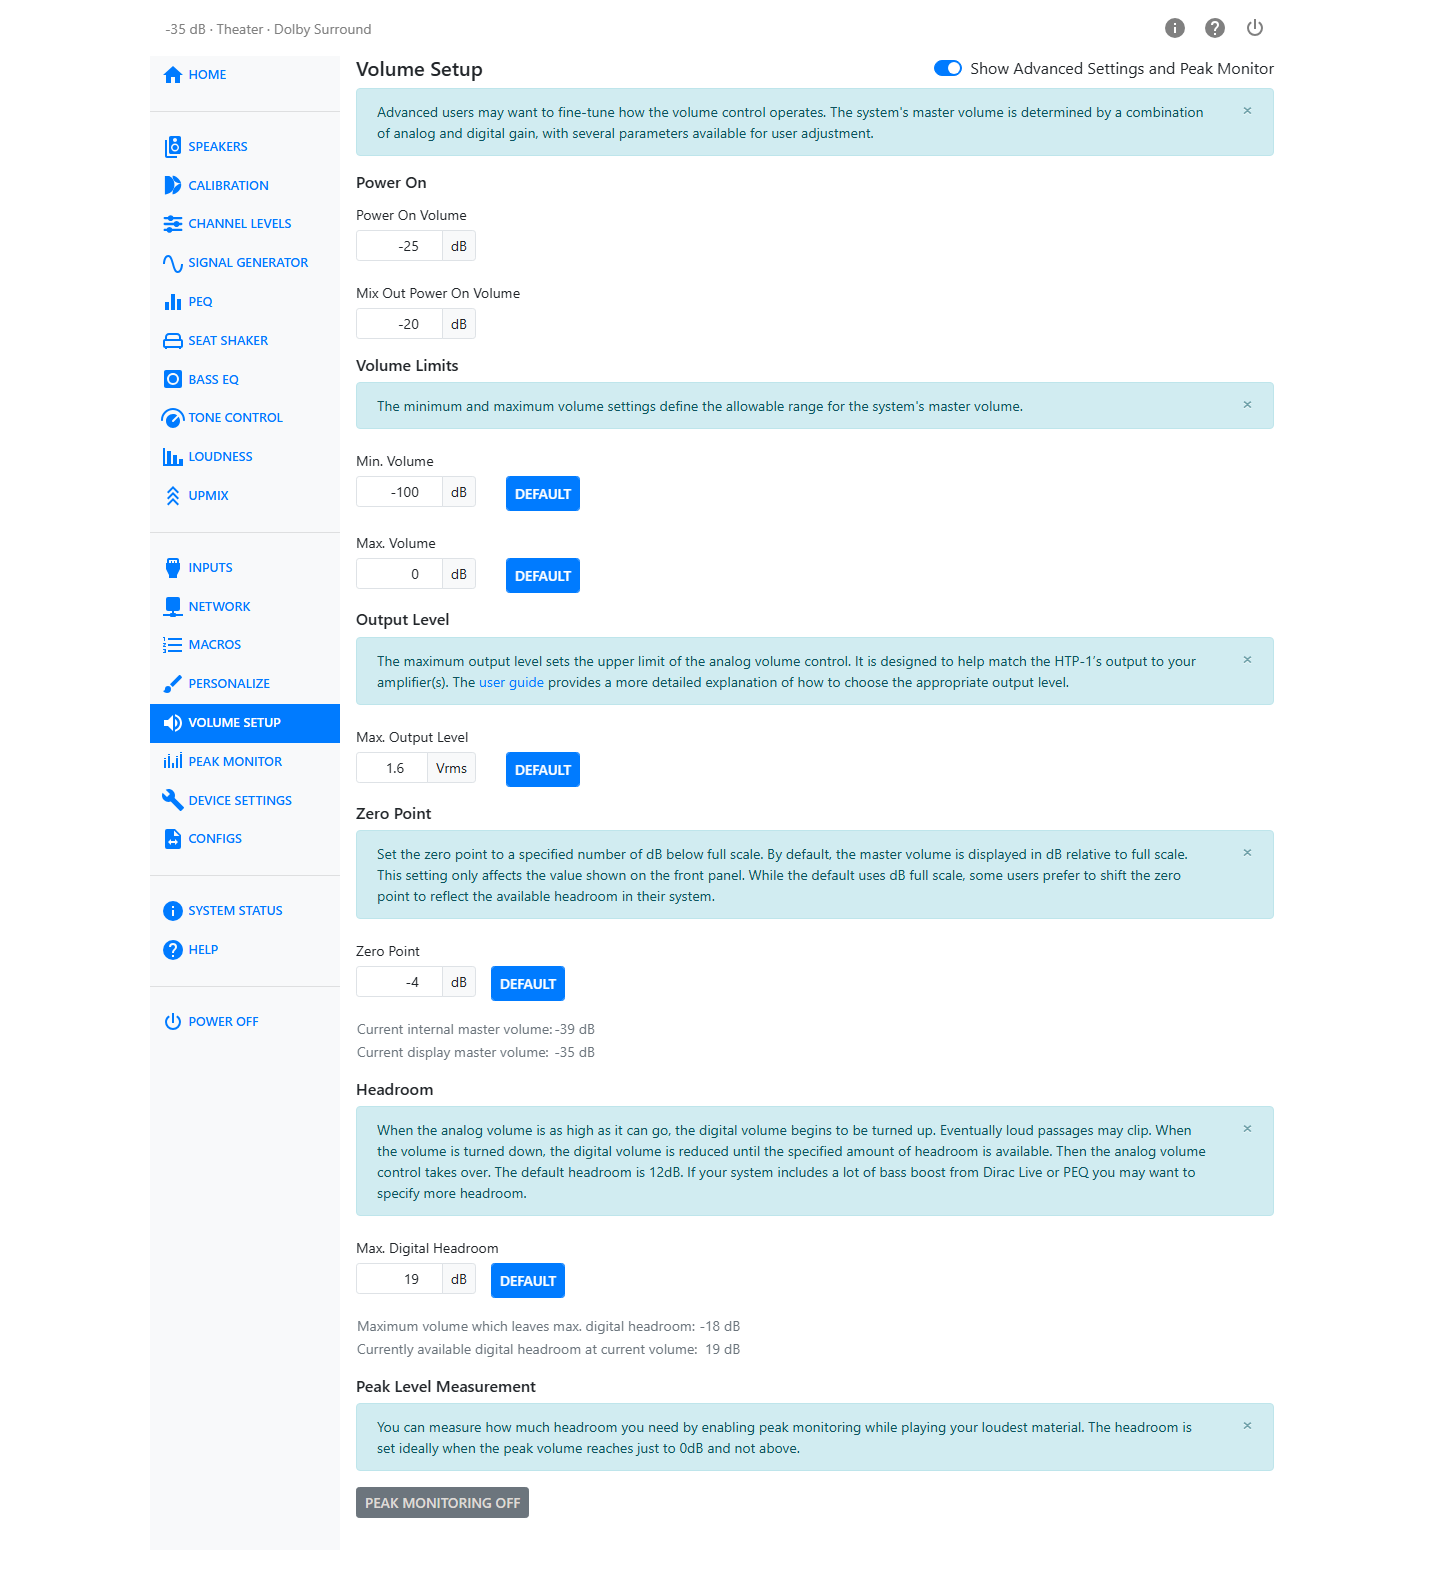
Enable Show Advanced Settings and Peak Monitor to reveal the Zero Point, Maximum Digital Headroom, and Peak Monitor controls described below.
Zero Point
By default, the master volume is displayed using the HTP-1's standard volume scale. Zero Point applies an offset to that displayed value, allowing you to choose which listening level appears as 0 dB.
This changes only the displayed volume. It does not change the actual playback level, underlying Master Volume, or the internal 0 dB reference point.
Zero Point ranges from −100 to +22 dB and includes a Default button. The advanced section displays both the internal and displayed Master Volume values so you can see how the offset is applied.
Zero Point applies to main-volume positions: current Main Volume, Power On Volume, Minimum Volume, Maximum Volume, and Highest playback volume that preserves digital headroom. It does not apply to Mix Out Volume, Mix Out Power On Volume, Maximum Digital Headroom, or Currently Available Digital Headroom. Changing Zero Point does not rewrite any of those underlying settings. Their displayed values change because the scale has moved.
Maximum Digital Headroom
Maximum Digital Headroom specifies the maximum amount of digital headroom the HTP-1 attempts to preserve for DSP processing.
The HTP-1 calculates and displays the Highest playback volume that preserves digital headroom—the highest master-volume setting before it begins consuming the configured digital headroom.
The full configured digital headroom remains available from the minimum volume up to this value. Above it, the HTP-1 gradually consumes the reserved headroom to allow higher playback levels.
In most systems, the default value provides a good balance between clipping protection and available analog gain.
| Control | Range | Default |
|---|---|---|
| Maximum Digital Headroom | 0 to 30 dB | 12 dB |
Use Peak Monitor to determine the smallest Maximum Digital Headroom value that avoids digital clipping. Lower values allow the HTP-1 to use more analog gain before it begins consuming digital headroom.
The page also shows two live readouts:
- Highest playback volume that preserves digital headroom — the calculated threshold described above.
- Currently available digital headroom — the digital headroom remaining at the current master-volume setting.
How the Volume Control Works
The HTP-1 automatically combines analog and digital gain to maximize dynamic range while minimizing the risk of digital clipping. The transition points depend on the configured Reference Output Voltage and Maximum Digital Headroom.
At lower listening levels, the HTP-1 keeps the full configured Maximum Digital Headroom available while adjusting playback level primarily through the analog stage. As the master volume rises beyond Highest playback volume that preserves digital headroom, the reserved headroom is gradually consumed.
Above internal 0 dB, the HTP-1 continues increasing analog gain when the configured Reference Output Voltage leaves sufficient analog output range. Once the analog gain reaches its limit, any remaining requested gain is applied digitally.
Recommended Setup
- Set Reference Output Voltage to match your amplifier's input sensitivity. If you're unsure, leave it at the default.
- Leave Maximum Digital Headroom at 12 dB initially.
- Use Peak Monitor to determine whether additional digital headroom is required.
Tip
Set Zero Point to Highest playback volume that preserves digital headroom. This makes displayed 0 dB your reference listening level. Increasing the volume above 0 dB gradually reduces the available digital headroom and may cause clipping on very loud peaks.
Peak Monitor
Peak Monitor is also available from the Peak Monitor page. It is included here because it is primarily used to configure Maximum Digital Headroom. See Peak Monitor for a complete description of its features.
Tip
Play your loudest program material with Peak Monitor enabled. Reduce Maximum Digital Headroom until clipping appears, then increase it step by step until clipping stops.