Inputs
The Inputs page lets you set up each input: its name, whether it shows on the homepage, its default listening mode, its lip-sync delay, its Dirac Live filter slot, and a macro to run when you select it. HDMI CEC and Bluetooth are also set up on this page.
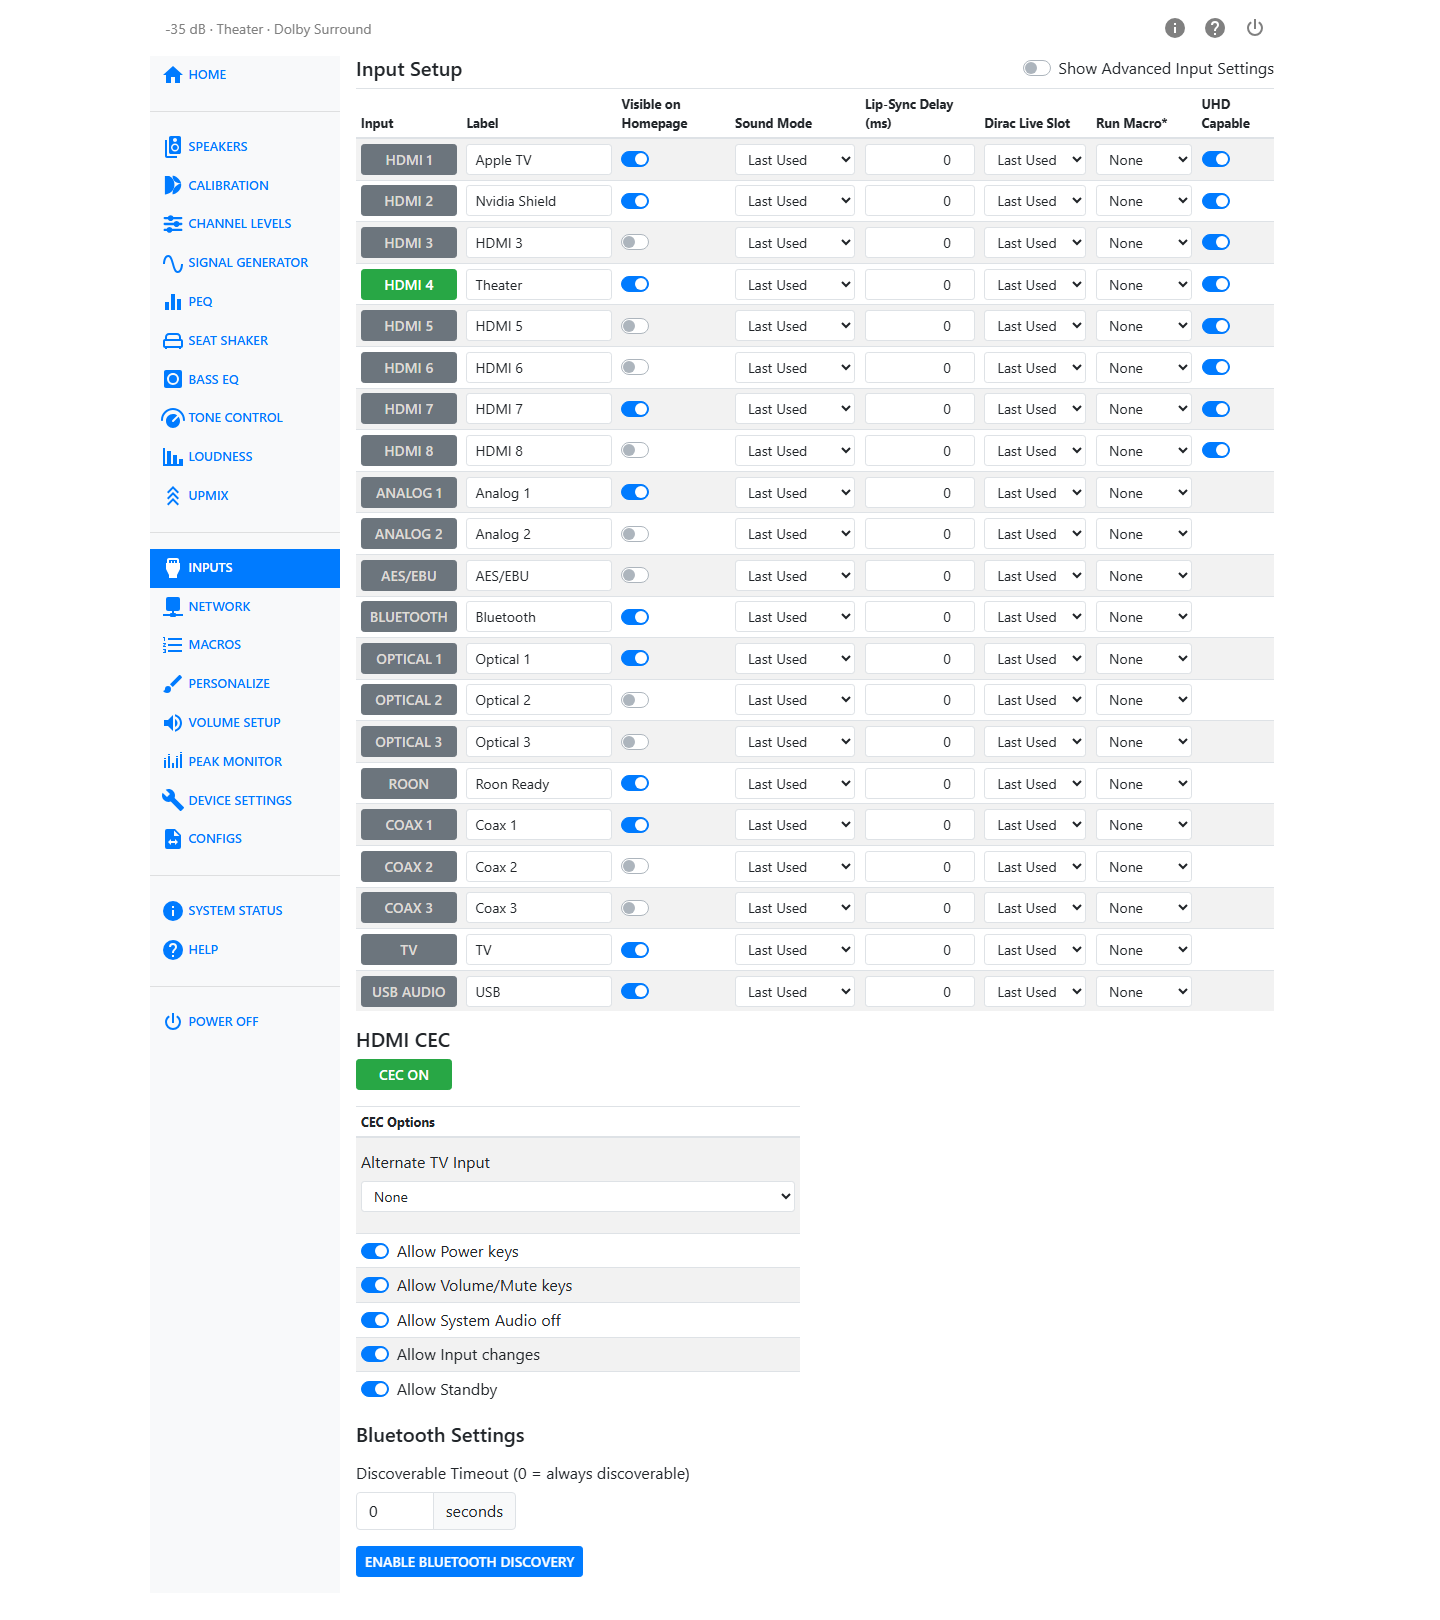
Clicking an input's name in the Input column selects that input immediately, so the table also works as an input selector.
The Input Table
| Column | What it does |
|---|---|
| Input | Shows the input's name. Click it to select that input. |
| Label | The name shown for this input on the front panel, the homepage, and the remote. |
| Visible on Homepage | Turns this input's button on or off on the Home page. |
| Listening Mode | The upmixer applied when you select this input, or Last Used to keep whatever upmixer was last chosen. |
| Lip-Sync Delay (ms) | Extra audio delay for this input, 0–340 ms. See Lip-Sync Delay below. |
| Dirac Live Slot | The Dirac Live filter slot applied when you select this input, or Last Used. |
| Run Macro | A macro to run automatically when you select this input, or None. |
| UHD Capable | Shown only for HDMI inputs. See UHD Support. |
| PCM Detect Sensitivity | Shown only when Show Advanced Input Settings is on. See PCM Detect Sensitivity below. |
Note
Turn on Show Advanced Input Settings, at the top right of the page, to reveal the PCM Detect Sensitivity column.
Naming the Audio/Video Sources
Type a name into the Label field for any input to change what is displayed for it on the front panel, the homepage, and the remote.
To make an input's button appear on the Home page, turn on its Visible on Homepage switch. Every input with this switch on appears on the homepage — there is no limit there. The HTP-1 remote's USER INPUT buttons work differently: they map to your visible inputs in order, and the remote can only reach the first nine.
For example, if Satellite, Streaming Stick, Cable Box, Blu-ray, Game Console, CD Player, and Roon are the visible inputs, in that order, the remote's user input buttons map as follows:
(1) Satellite (2) Streaming Stick (3) Cable Box (4) Blu-ray (5) Game Console (6) CD Player (7) Roon
Listening Mode
Listening Mode sets the upmixer the HTP-1 switches to whenever you select this input. Choose Last Used to leave the upmixer alone and keep whichever one was last selected.
Lip-Sync Delay
Lip-Sync Delay (ms) adds extra delay to an input's audio, to bring it back into sync with video that a TV or display has delayed through its own video processing. The range is 0–340 ms.
The 340 ms figure is a ceiling on the total delay applied to a channel, not just the lip-sync delay you enter here — that ceiling also has to cover any delay already used by speaker calibration. The full 340 ms is guaranteed at all supported sample rates up to and including 192 kHz.
Tip
Personalize lets you add an Input Delay ± stepper to the Home page, so you can nudge this value without opening the Inputs page.
Dirac Live Slot
Dirac Live Slot sets the Dirac Live filter slot the HTP-1 switches to whenever you select this input. Each option shows the slot's name along with a badge for its filter type (ART, BC, BM, or RC). Choose Last Used to leave the current filter slot alone.
Run Macro
Run Macro runs a macro automatically whenever you select this input — useful for things like turning on a TV or switching an AV receiver's input at the same time. Choose None to do nothing. The macros available here are the ones you have created on the Macros page.
UHD Capable
The UHD Capable switch appears only for HDMI inputs. By default, all HDMI inputs advertise Ultra High Definition (UHD) support. Some older source devices behave poorly when told they can output a 4K/UHD signal — you might see discolored or corrupted video, or lose audio entirely. Turning UHD Capable off for that input removes the UHD-related information from the EDID, so the source only sees a 2K signal. See UHD Support for the technical detail.
Watch Video with Other Audio
If you select a video (HDMI) input and then select a non-video input (analog or SPDIF, etc.), the initially selected video will continue to be displayed while the new audio is played. There is no way to watch video from one HDMI source and listen to audio from another HDMI source. This method does allow you to listen to music from a non-HDMI source while watching an HDMI source. If you wish to blank the video while listening to audio, just choose an inactive HDMI source before choosing the audio.
Partial Reset by Changing Inputs
Changing inputs resets the DSP path but not the entire DSP. In the rare case that a source is not rendered properly, first try changing inputs. Powering down the unit when in Fast Start mode fully resets the DSP. A cold power cycle from the back panel also resets the HDMI board and all controllers.
PCM Detect Sensitivity
The HTP-1 normally detects the audio format by examining the incoming bitstream. Auto is appropriate for almost all modern sources.
Turn on Show Advanced Input Settings, at the top of the Inputs page, to reveal the PCM Detect Sensitivity column.
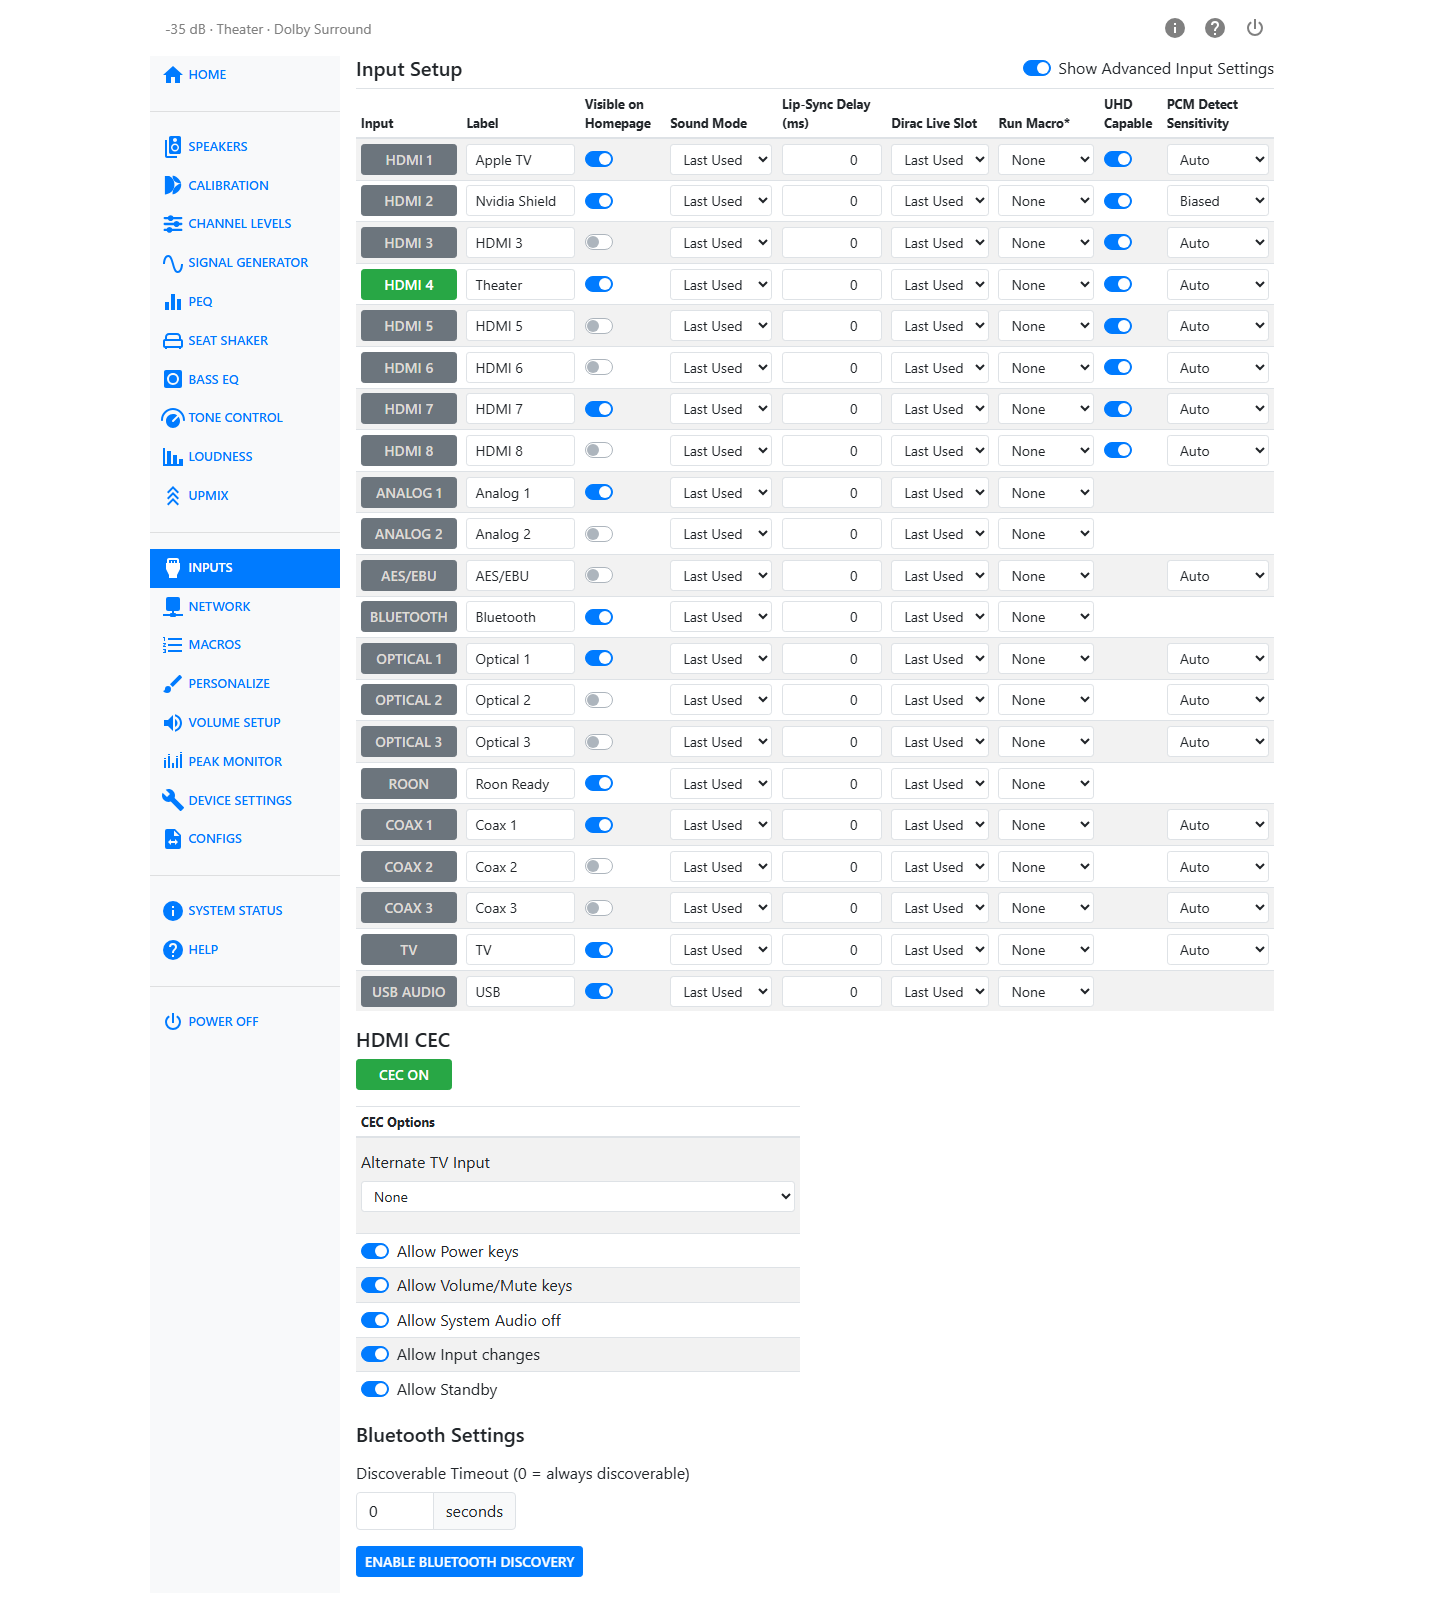
The choices depend on the input. Some inputs provide no PCM Detect Sensitivity setting, some provide Auto and Biased, and some provide Auto, Biased, and Indicated.
- Auto detects the format by examining the bitstream and decodes it accordingly. This should be correct in almost all cases. Automatic detection was less reliable in older firmware versions.
- Indicated uses the format reported through HDMI signaling. If Auto does not identify an HDMI signal correctly, try Indicated.
- Biased biases automatic detection toward PCM. This was particularly useful with older Apple TV (Gen 1) devices that switched from coded audio to PCM for menu sounds.
Unconventional material from sources such as YouTube may occasionally be identified incorrectly. If coded digital audio is mistaken for PCM, it is reproduced as loud white noise. If this happens, stop playback and try another available setting.
HDMI CEC
The HDMI CEC section turns CEC (Consumer Electronics Control) on or off and, when it's on, shows the CEC options. CEC lets the HTP-1 and your TV pass remote-control commands to each other over HDMI, and it underlies ARC. For what CEC and ARC/eARC do and how to connect them, see Connectivity.
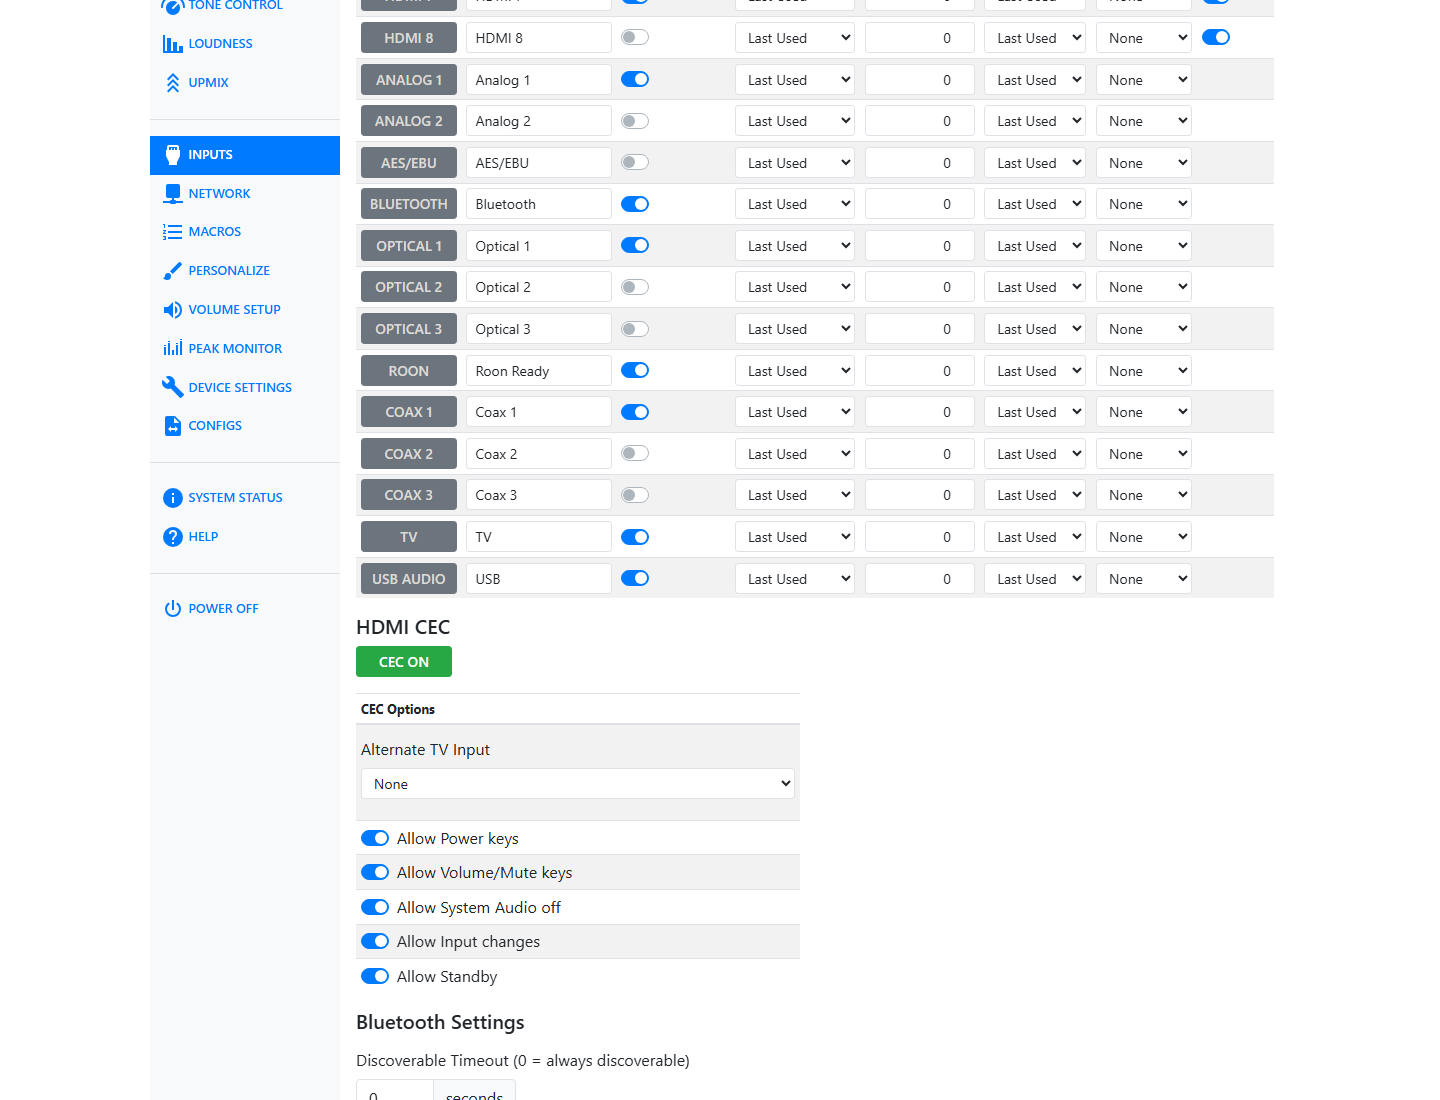
Turn on the CEC button to enable CEC. The CEC Options table then appears below it:
| Option | What it does |
|---|---|
| Alternate TV Input | Selects the HTP-1 input used for TV audio when ARC/eARC is unavailable. Options are None, Analog1, Analog2, COAX1, COAX2, COAX3, Optical1, Optical2, Optical3. See Alternate TV Input. |
| Allow automatic input switching | Allows the HTP-1 to follow CEC source and input changes. |
| Allow volume and mute control | Allows CEC volume and mute commands to control the HTP-1. |
| Allow switching to TV speakers | Allows CEC to turn System Audio Mode off and return audio playback to the TV. |
| Allow power commands | Allows CEC power commands (on, off, and toggle) to control the HTP-1. |
| Allow standby commands | Allows CEC Standby commands to put the HTP-1 into standby. |
All five switches should stay on unless a specific device on your CEC network doesn't play well with one of them. For instance, you might turn off Allow automatic input switching if a source doesn't handle it well.
Bluetooth Settings
Bluetooth devices — such as a phone for casual music playback — are connected from this page.
Discoverable Timeout sets, in seconds, how long the HTP-1 stays visible to nearby devices after you turn on discovery. Enter 0 to make it always discoverable. Press Enable Bluetooth Discovery to start the discoverable window.
Your mobile device should now be able to see the HTP-1 and pair with it. A pairing-request prompt appears in the web UI when a device asks to pair — accept it there.
Tip
If you are pairing with the HTP-1 while also using your mobile device's web browser to control it, switching back and forth can clear the pairing prompt and abort pairing. Try again and accept the prompt as soon as you see it.
USB Audio Input
Devices that produce USB audio can be connected to the (house-shaped) type B USB connector on the back panel. HTP-1 advertises itself as capable of accepting 24-bit or 32-bit audio at 48000 Hz.