Network
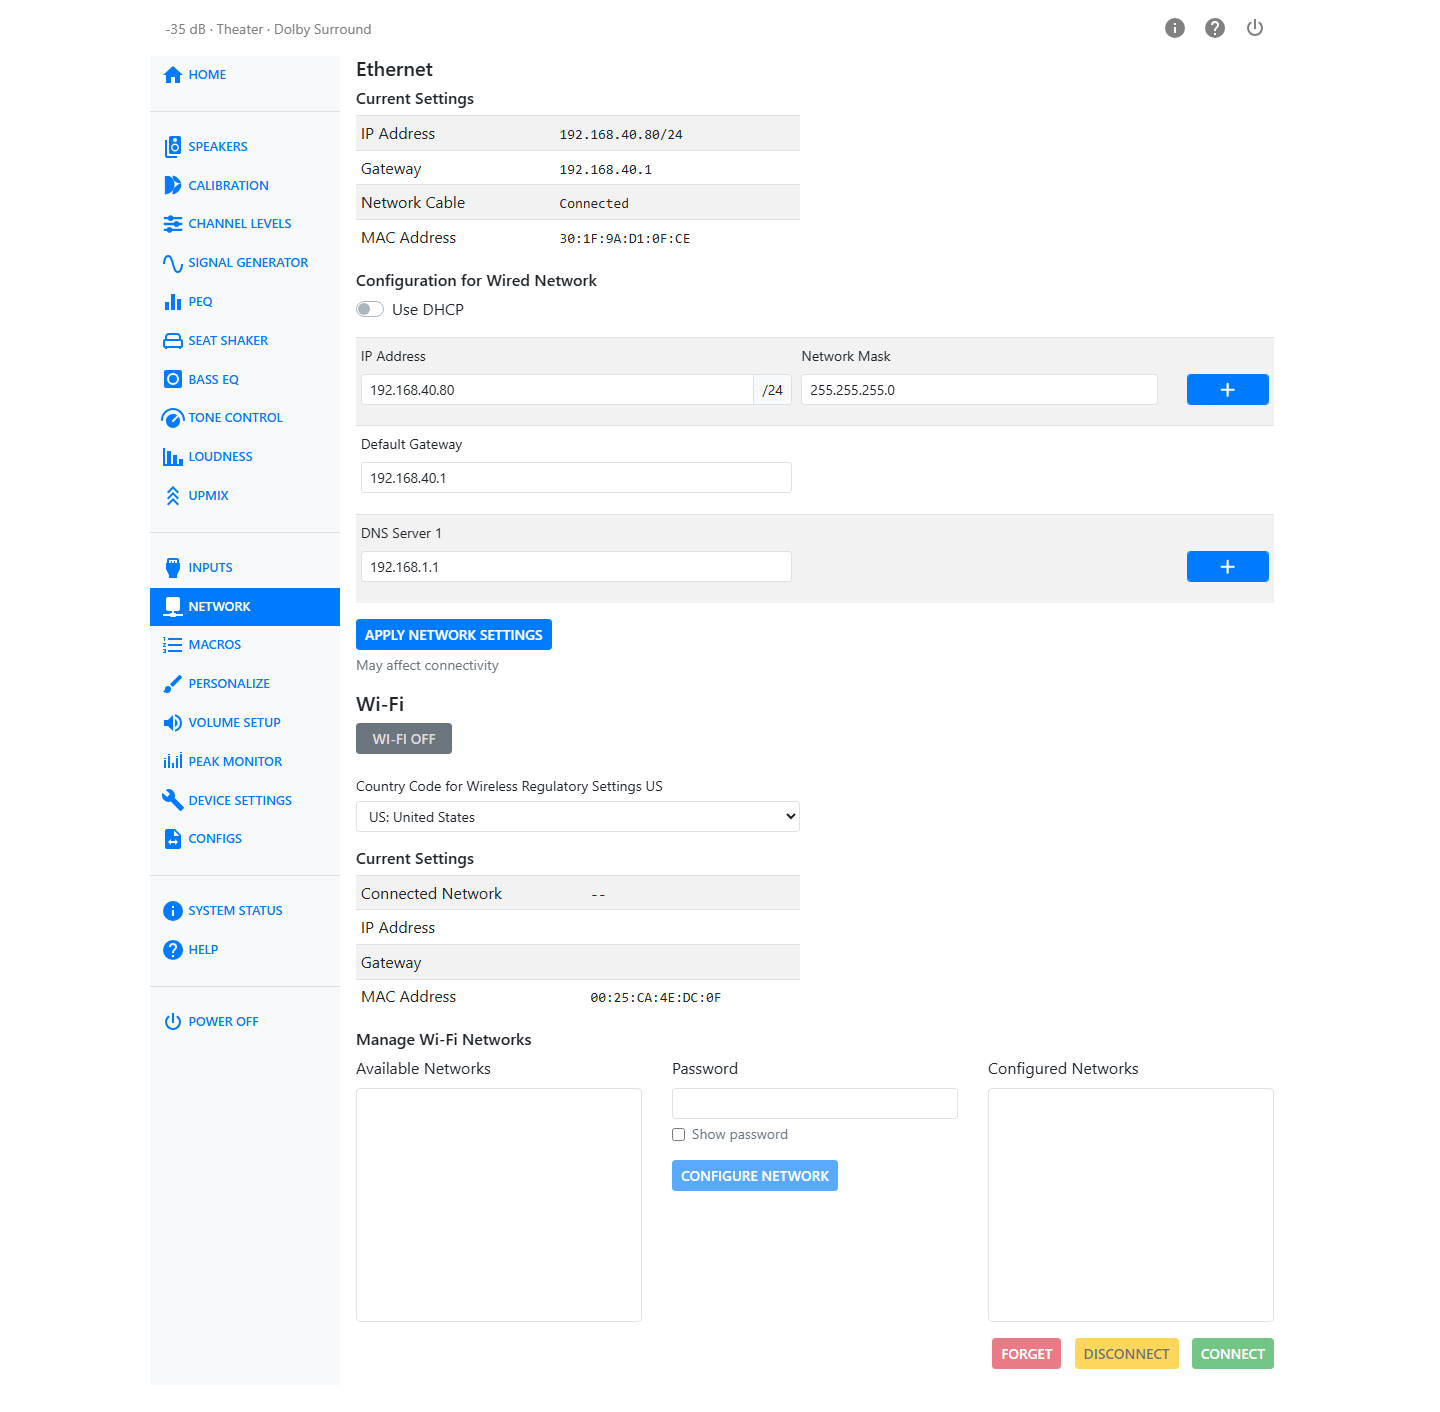
The Network page sets up the HTP-1's wired and wireless network connections.
Ethernet
The Current Settings table shows the wired connection's IP Address, Gateway, whether the Network Cable is Connected or Disconnected, and the interface's MAC Address.
Note
In earlier system software builds the wired network interface could fail to obtain an IP address if connected to a gigabit Ethernet port. This problem has been resolved in the latest software. If your unit still fails to get an IP address by DHCP when cold-booted, you have a few options. Often unplugging the Ethernet cable for a few seconds and then plugging it back in will result in your router assigning an address. You can also configure the switch or router port it is connected to for 100 Mbit/s. When you have updated to the latest software you will not have this problem.
Below Current Settings, Configuration for Wired Network lets you choose DHCP or a manual address. DHCP is typically used to automatically assign an IP address; turn it off to enter a static address instead. With DHCP off you can set the default gateway, add one or more IP addresses, and add one or more nameservers (DNS), using the plus and minus buttons next to each row. Press Apply Network Settings to send your changes — you may lose your connection briefly while they take effect.
If no Ethernet cable is connected, this section prompts you to connect one before you can configure the wired network.
Wi-Fi
Turn on the Wi-Fi button to enable the Wi-Fi radio. Make sure the antenna that came with the unit is connected to the gold SMA antenna connector on the rear panel.
Set Country Code for Wireless Regulatory Settings to your country. This affects which Wi-Fi channels and transmit power levels the HTP-1 is allowed to use, so pick the country you're actually in.
Once connected, a Current Settings table shows the Connected Network, IP Address, Gateway, and MAC Address for the Wi-Fi interface.
Manage Wi-Fi Networks
Available Networks lists nearby Wi-Fi networks. The HTP-1 rescans automatically every five seconds while this page is open — there is no separate Scan button, and scanning stops once you navigate away.
Select a network from the list, enter its Password (turn on Show password if you want to check what you typed), and press Configure Network to add it.
Configured Networks lists networks you have already set up. Select one to enable Forget, Disconnect, and Connect for it. DHCP or static addressing for that network is set up underneath, in a Configuration for Wi-Fi Network panel identical in layout to the Ethernet one.
Dirac Live and Wi-Fi
Third-party tools like the Dirac Live calibration app may not find the HTP-1 if both network interfaces are enabled. Choose either wired or wireless for calibration.
Resetting the Network Connection
There is a way to completely reset the network connections from the front panel. Poke your finger on the gear icon on the front panel. You may need to move your finger around a bit. The front panel responds by displaying information about the network connection. A "Reset Network" button is an option there. This is designed to bring the Ethernet and Wi-Fi network back to normal DHCP operation.