Basic Setup
Check your software version early
The HTP-1's software is still actively developed, and updates are installed by owners rather than pushed automatically. Units in the field run a wide range of builds, and a unit that has been sitting in a box — or in a rack — may be several years behind. Much of what this manual describes, and several fixes to problems you might otherwise spend an evening chasing, only exist in recent software.
If you are setting up an HTP-1 for the first time, plan on updating it. You can do that once the unit is on the network and you can reach its web interface — see Update the Firmware below and Updates and Support. For background on why the software keeps moving, see The Nature of the Project.
System Requirements
- AC power
- Ethernet connection (initially wired, then Wi-Fi if desired)
- Audio and video sources
- Connection to an amplifier
- A modern web browser, preferably on a device larger than a phone.
Step by Step
The best way to become familiar with the HTP-1 is to simply start using it! Before delving into more advanced topics, we will connect one HDMI® source, an HDMI display, and a power amplifier in stereo 2.0.0 mode. Perform the following steps to connect these devices. The internal signal generator can also be used as a test source with no external source.
- Prepare a location for the HTP-1. Ensure that it is not in an enclosed cabinet, that it has at least 3" of space around and above the unit, and that it is in a well-ventilated area to ensure sufficient cooling airflow. The HTP-1 can operate entirely from a Wi-Fi link, but it is best to connect to a wired Ethernet first and use that connection to configure the Wi-Fi network. If your final location does not include a wired Ethernet cable, then see the note below on Initial Wi-Fi Setup.
- Ensure that all equipment to be connected is powered off and unplugged from its power source.
- Connect the included Bluetooth®/Wi-Fi® Antenna to the antenna jack on the rear panel.
-
Using a Cat5e or Cat6 Ethernet cable (not included), plug one end into the ETHERNET jack on the rear panel, then plug the other end into your Wi-Fi® router or Ethernet switch.
Note
In earlier system software builds the wired network interface could fail to obtain an IP address if connected to a gigabit Ethernet port. This problem has been resolved. If your unit still fails to get an IP address by DHCP when cold-booted, you have a few options. Configure the switch or router port it is connected to for 100 Mbit/s. Often unplugging the Ethernet cable for a few seconds and then plugging it back in will result in your router assigning an address. You can also reset the HTP-1's network interfaces from the Help screen by tapping the ? icon on the front panel and selecting Reset Network.
-
Using an HDMI Cable (not included), plug one end into the input on your HDMI® display, then plug the other end into HDMI OUTPUT 1 on the rear panel. A "Premium High Speed" HDMI cable is specified for UHD/4K operation.
Note
HDMI OUTPUT 1 supports the Audio Return Channel (ARC) and Enhanced Audio Return Channel (eARC) HDMI features, which send audio from the connected display back to the amplifier. The ARC/eARC feature is necessary if you plan on streaming video from the internet using an application on your TV or if you plan on receiving over-the-air TV broadcasts using an HD antenna connected to the TV. You must connect the TV to output 1 for (e)ARC to work.
-
Using suitable speaker cable (not included), connect your speakers to the corresponding outputs on your power amplifier. A 2.5 mm² (approximately 13–14 AWG) stranded copper speaker cable is sufficient for most home theater installations and cable runs up to about 10 m (33 ft). For longer runs, 4 mm² (approximately 11 AWG) cable is recommended. Ensure that there are no stray wire strands that could cause a short circuit, and maintain correct polarity (+ to +, − to −) for all speaker connections.
- If your power amplifier has XLR inputs, plug an XLR cable (not included) into the left channel input on your power amplifier, then plug the other end into the LEFT MAIN OUTPUT on the rear panel. If your power amplifier only has RCA inputs, use an XLR to RCA cable (not included) instead. Repeat for the right channel.
- Using another (Premium High Speed) HDMI® Cable (not included), plug one end into HDMI INPUT 1 on the rear panel, then plug the other end into the HDMI output on a video source device (e.g., DVD player, Blu-ray Disc™ player, satellite receiver, cable box, etc.).
- Ensure that the Master Power Switch on the rear panel is in the OFF position (O side depressed).
- Plug the included AC Power Cord into the C14 power connector on the rear panel, then plug the other end into a nearby AC power outlet.
- Plug in and power on all connected devices. Start video playback on your video source device.
- Flip the Master Power Switch on the rear panel to the ON position (I side depressed) to boot the system. You should see the Monolith logo displayed on the front panel within seconds after pressing the power switch. The front panel power switch should begin flashing blue. After about a minute the display should show "Almost Ready". Finally the front panel will display the main screen. Once the unit has finished booting, the Front Panel LCD Display will look similar to the display in the Product Overview section. The blue light on the front panel power switch goes dark again when the unit is ready.
-
For normal operation, use the Power/Standby Button on the front panel to turn the unit on or put it into standby mode, rather than using the Master Power Switch on the rear panel.
Note
The HTP-1 supports two standby modes: Slow Boot (default) and Fast Start. In Slow Boot mode, the unit powers down virtually all internal components, reducing standby power consumption to less than 0.5 W. The front panel becomes operational in approximately 1 minute 40 seconds, while additional initialization continues in the background and may take up to 2 minutes 30 seconds to complete.
In Fast Start mode, most of the internal electronics remain powered, so the unit starts almost instantly. Only the front panel is turned off while in standby, resulting in standby power consumption that is nearly as high as when the unit is fully powered on.
You can enable Fast Start from the Device Settings page of the web interface.
-
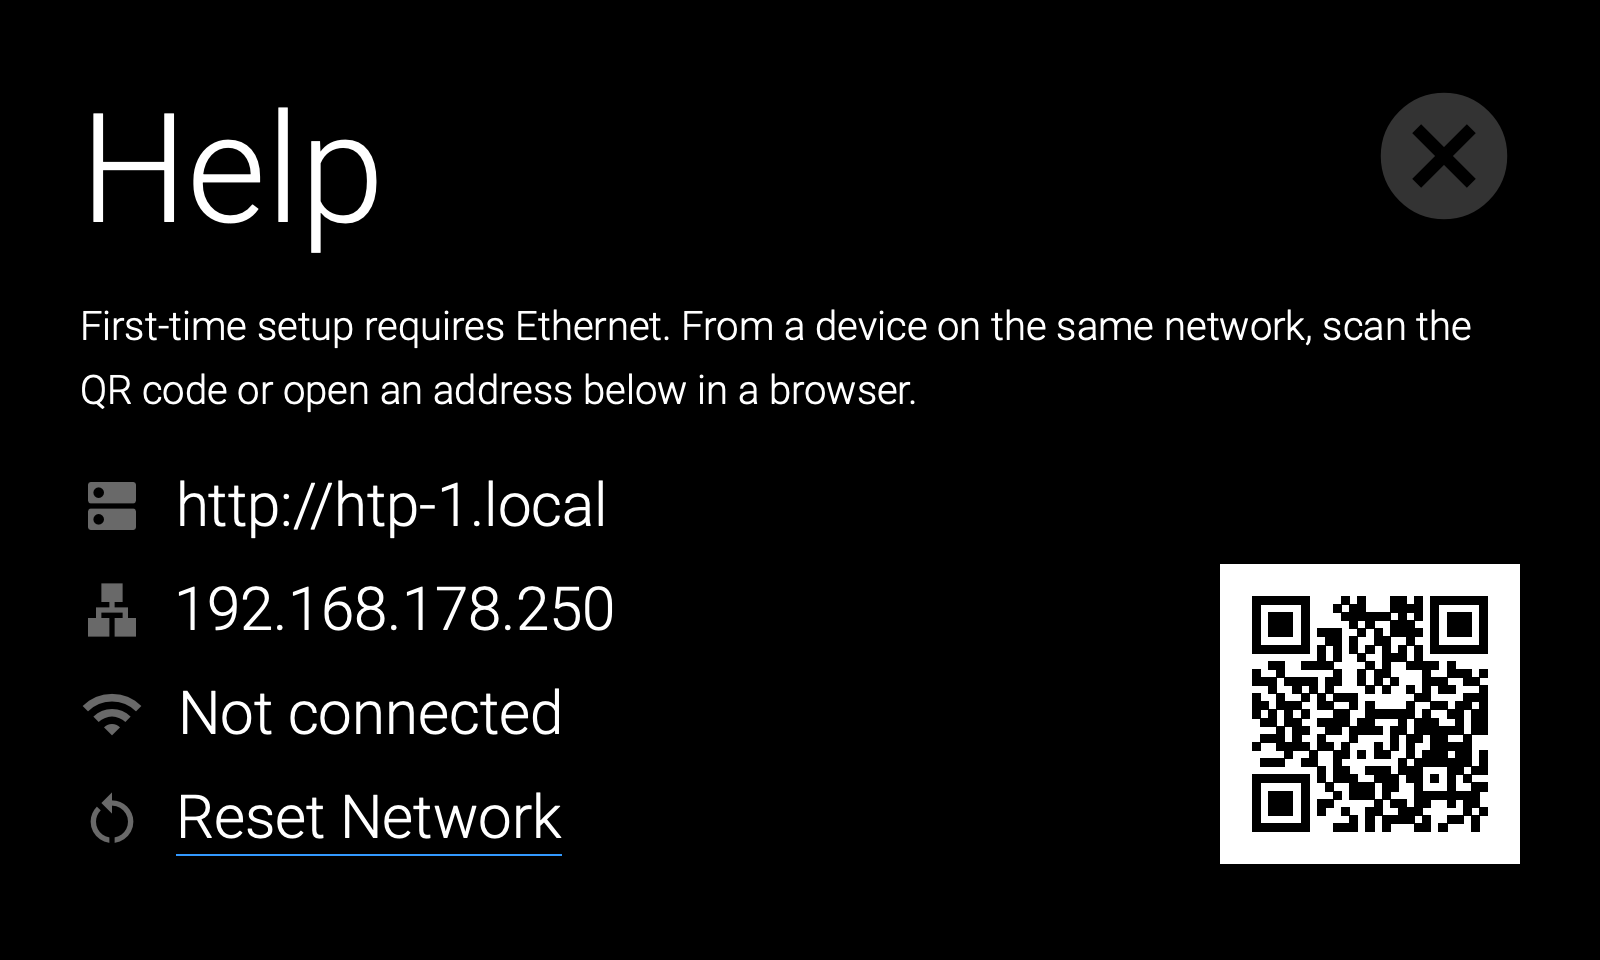
On first startup, the front panel provides the information needed to access the HTP-1's web interface from another device on the same network. Open the Help screen by tapping the ? icon in the top right. It shows the HTP-1's mDNS hostname, network addresses, and a QR code.
-
Open a web browser on your computer or other device on the same network. The easiest address to use is usually the mDNS hostname shown on the front panel, such as
http://htp-1.local. You can also use the displayed IP address.Make sure to include
http://explicitly, as some browsers default tohttps://, which will not work. You can also scan the displayed QR code with your mobile phone to open the web interface directly.Bookmark the plain address rather than a settings page, since pages within the interface use hash-mode addresses such as
http://htp-1.local/#/settings/speakers. -
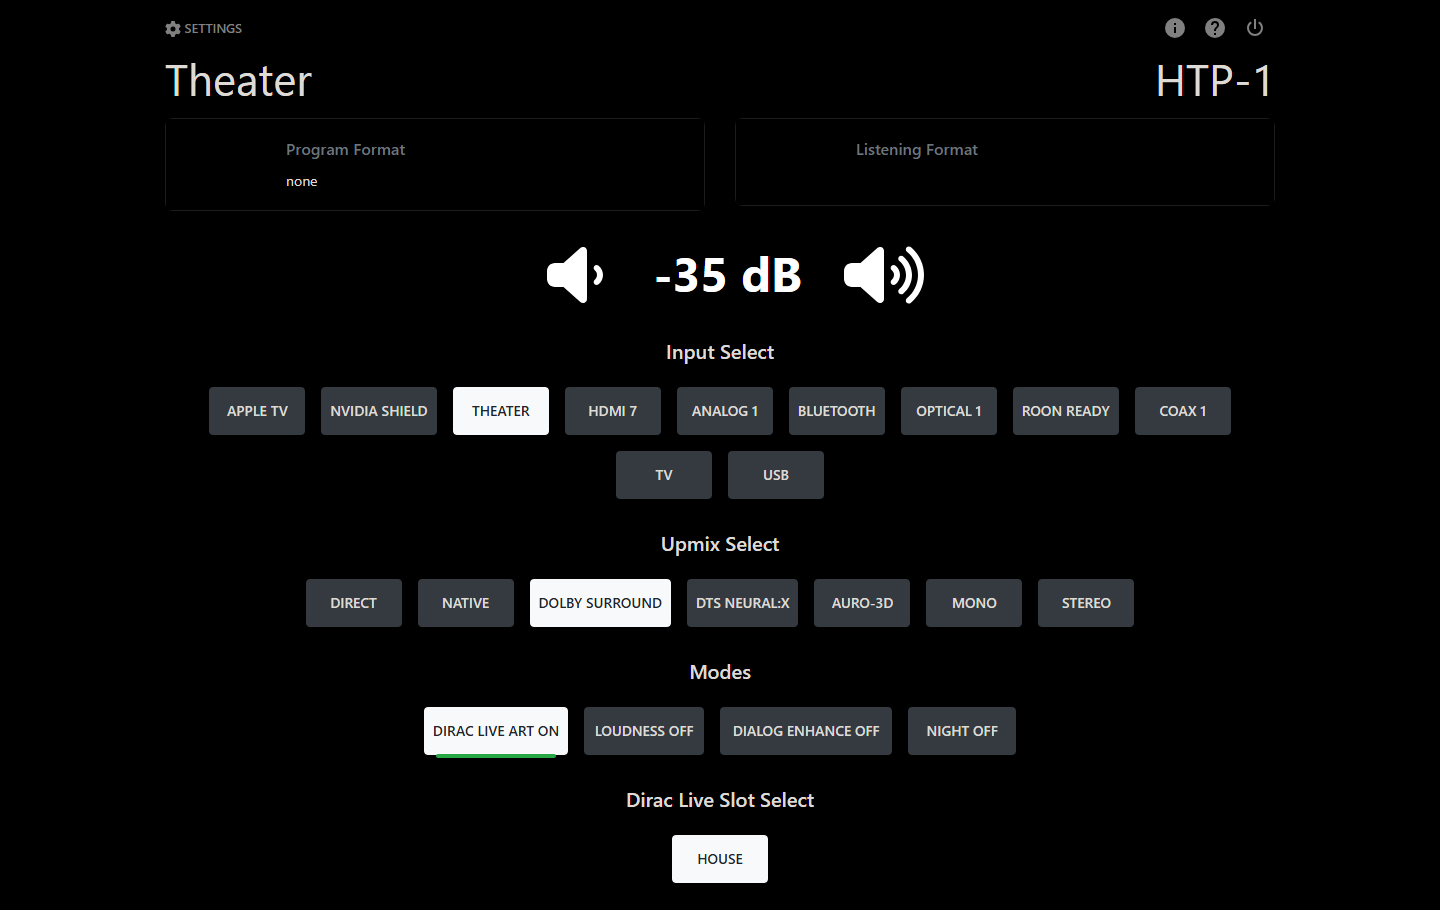
If your source connected to HDMI 1 is playing, you should see the front panel and the Home page describe the program format and the listening format. The front panel should display -50dB as the default initial volume.
-
Slowly turn the Volume Knob on the front panel clockwise until the volume is at a comfortable level. Verify that both the left and right audio channels are playing audio properly and that there is video on your display.
Congratulations! You have finished the Basic Setup and are ready to learn more about the advanced features and functionality of the HTP-1.
-
Click the gear icon (labeled Settings) in the top-left corner of the Home page. This opens the settings sidebar. Explore the Speakers page and the Signal Generator page — see Product Overview for the full page list.
Initial Wi-Fi Setup
The HTP-1 serves a web page via its Ethernet connection and this is used for all setup. You must connect to a network. If you wish to use a Wi-Fi connection exclusively, begin by booting up the HTP-1 with a wired connection. You can set up the Wi-Fi connection, disconnect the Ethernet cable and then move the HTP-1 to its final location.
The Connectivity chapter gives further information on Wi-Fi, in the context of the Network page.
- Connect the included Bluetooth®/Wi-Fi® Antenna to the antenna jack on the rear panel.
- Connect an Ethernet cable to the HTP-1 so that your router can assign an IP address.
- Following the boot steps above, boot up the HTP-1 and open its web interface.
- Click the gear icon in the top-left corner of the Home page to open settings, then choose Network from the sidebar (setup group). There will be a short delay as the network system is prepared. You should see your wired Ethernet connection described under Current Settings.
- Scroll down to the Wi-Fi section. Turn Wi-Fi on, and confirm DHCP is enabled. Under Manage Wi-Fi Networks you should see your local Wi-Fi networks listed.
- Choose a network (an SSID). Enter the password — there is an option to show it as you type. Click Configure Network. After a brief delay, the network appears in the list of configured networks and is described as connected. The front panel of the HTP-1 should display the Wi-Fi address on the Help screen after tapping the ? icon in the top right. (The Connect, Disconnect and Forget buttons in the configured-network list are used afterward, to manage a Wi-Fi network you have already set up.)
- You can now remove the wired Ethernet connection. If necessary you can move the HTP-1 to its final location and continue with the audio and video connections.
Update the Firmware
After you have completed the basic setup is a good time to check for firmware updates. Available firmware updates are advertised on the System Status page, under History and Updates. See Firmware Updates & Support for the update process.
Interface Description
If you followed the Basic Connections instructions above you should be ready to use some of the more advanced features. Click the gear icon in the top-left corner of the Home page to open the settings sidebar. See Product Overview → Web Interface for the full map of the sidebar's three groups and what each page does.
Tip
The circled question mark in the top-right corner of most pages opens page-specific help.